Upload an image using Java and PHP

Whilst working on a recent project I needed a way of transferring images (screenshots to be specific) from the client machine to a web server hosted in the cloud. My choice of platform was Java on the client machine and then PHP on the server side to recieve and process the upload.
So basically I needed to upload an image to a web server using Java and PHP. Reading and writing simple data to and from a web server with Java is pretty easy really but when it comes to transferring files things get that little bit tougher. This is because when uploading files the content type of the HTTP request changes from plain text to multipart making it trickier. You could either write a whole load of extra code to deal with this or you could simply send the data over as plain text and then just let PHP deal with it. Here’s how it’s done.
// Setup vars
HttpURLConnection httpUrlConnection;
OutputStream outputStream;
BufferedInputStream fileInputStream;
BufferedReader serverReader;
int totalBytes;
int bytesTrasferred;
String response = "";
String serverResponse = "";
String localFileName = "mypicture.jpg";

// Establish a connection
httpUrlConnection=(HttpURLConnection)new URL("http://www.example.com/upload.php").openConnection();
httpUrlConnection.setDoOutput(true);
httpUrlConnection.setRequestMethod("POST");
outputStream = httpUrlConnection.getOutputStream();

// Buffered input stream
fileInputStream = new BufferedInputStream(new FileInputStream(localFileName));

// Get the size of the image
totalBytes = fileInputStream.available();

// Loop through the files data
for(int i=0; i < totalBytes; i++)
{
// Write the data to the output stream
outputStream.write(fileInputStream.read());
bytesTrasferred = i + 1;
}

// Close the output stream
outputStream.close();

// New reader to get server response
serverReader = new BufferedReader(new InputStreamReader(httpUrlConnection.getInputStream()));

// Read the servers response
serverResponse = "";
while((response = serverReader.readLine()) != null)
{
serverResponse = serverResponse + response;
}

// Close the buffered reader
serverReader.close();

// Close the file input stream
fileInputStream.close()

// Config
$uploadBase = "img/";
$uploadFilename = time() . ".jpg";
$uploadPath = $uploadBase . $uploadFilename;

// Upload directory
if(!is_dir($uploadBase))
mkdir($uploadBase);

// Grab the data
$incomingData = file_get_contents('php://input');

// Valid data?
if(!$incomingData)
die("No input data");

// Write to disk
$fh = fopen($uploadPath, 'w') or die("Error opening file");
fwrite($fh, $incomingData) or die("Error writing to file");
fclose($fh) or die("Error closing file");

echo "Success";
And that’s all there is. By placing the PHP script above onto a suitable web server and then executing the Java code you’ll be able to quite easily and painlessly transfer images (or any other file types) from the desktop client to the web.
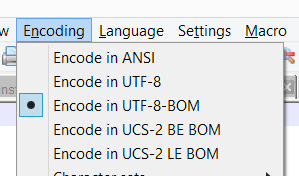
£ UTF-8 Encoding Issue

When applying the function htmlentities on some POST input from a user submitted form you may come across an issue with character encoding where characters such as £ and © are not displaying correctly and are prepended with the  character. This is typically caused by a UTF-8 encoding issue and the solution is quite easy. Simply pass in the character set to the htmlentities like this.
htmlentities($value, ENT_COMPAT | ENT_HTML401, 'UTF-8');
The ‘ENT_COMPAT | ENT_HTML401′ paramater is there simply because it is the default for this function, but the important bit is passing in ‘UTF-8′ in the third parameter.
WordPress 404 error redirect

By simply adding a file called 404.php into your WordPress theme directly you can quite easily create and customize the page shown when a visitors tries to access something which isn’t there. But what if you wanted to automatically redirect this user to your front page (or some other page on your site) instead of showing them a 404 error page? Well, the solution is quite simple.
header("HTTP/1.1 301 Moved Permanently");
header("Location: ". get_bloginfo('url'));
If you place the above code snippet and nothing else into a file called 404.php within the root of your WordPress theme directory then whenever someone tries to view a page which doesn’t exist they will be automatically and instantly redirected to your sites homepage.
Be careful though, you need to make sure that there are no spaces, empty lines or any other type of output (includng HTML) above those two lines of code. If there are then you’ll most likely get a PHP error complaining that the headers cannot be set as there has already been some output.
Of course you don’t necessarily have to redirect them to your front page. You could change it to redirect all 404 page not found requests to some other page on your site. For example, the following code snippet would redirect the visitor to your “/about/” page.
header("HTTP/1.1 301 Moved Permanently");
header("Location: ". get_bloginfo('url') . "/about/");
It’s as simple as that. You’ve now redirected all 404 page not found requests to some other page on your site. Simple!