keyboard_arrow_right
PHP Tutorial
PHP Tutorial

PHP Tips for your Website

PHP Tips for your Website

Upload an image using Java and PHP

jp

Whilst working on a recent project I needed a way of transferring images (screenshots to be specific) from the client machine to a web server hosted in the cloud. My choice of platform was Java on the client machine and then PHP on the server side to recieve and process the upload.

So basically I needed to upload an image to a web server using Java and PHP. Reading and writing simple data to and from a web server with Java is pretty easy really but when it comes to transferring files things get that little bit tougher. This is because when uploading files the content type of the HTTP request changes from plain text to multipart making it trickier. You could either write a whole load of extra code to deal with this or you could simply send the data over as plain text and then just let PHP deal with it. Here’s how it’s done.

// Setup vars
HttpURLConnection httpUrlConnection;
OutputStream outputStream;
BufferedInputStream fileInputStream;
BufferedReader serverReader;
int totalBytes;
int bytesTrasferred;
String response = "";
String serverResponse = "";
String localFileName = "mypicture.jpg";

// Establish a connection
httpUrlConnection=(HttpURLConnection)new URL("http://www.example.com/upload.php").openConnection();
httpUrlConnection.setDoOutput(true);
httpUrlConnection.setRequestMethod("POST");
outputStream = httpUrlConnection.getOutputStream();

// Buffered input stream
fileInputStream = new BufferedInputStream(new FileInputStream(localFileName));

// Get the size of the image
totalBytes = fileInputStream.available();

// Loop through the files data
for(int i=0; i < totalBytes; i++)
{
// Write the data to the output stream
outputStream.write(fileInputStream.read());
bytesTrasferred = i + 1;
}

// Close the output stream
outputStream.close();

// New reader to get server response
serverReader = new BufferedReader(new InputStreamReader(httpUrlConnection.getInputStream()));

// Read the servers response
serverResponse = "";
while((response = serverReader.readLine()) != null)
{
serverResponse = serverResponse + response;
}

// Close the buffered reader
serverReader.close();

// Close the file input stream
fileInputStream.close()

// Config
$uploadBase = "img/";
$uploadFilename = time() . ".jpg";
$uploadPath = $uploadBase . $uploadFilename;

// Upload directory
if(!is_dir($uploadBase))
mkdir($uploadBase);

// Grab the data
$incomingData = file_get_contents('php://input');

// Valid data?
if(!$incomingData)
die("No input data");

// Write to disk
$fh = fopen($uploadPath, 'w') or die("Error opening file");
fwrite($fh, $incomingData) or die("Error writing to file");
fclose($fh) or die("Error closing file");

echo "Success";

And that’s all there is. By placing the PHP script above onto a suitable web server and then executing the Java code you’ll be able to quite easily and painlessly transfer images (or any other file types) from the desktop client to the web.

£ UTF-8 Encoding Issue
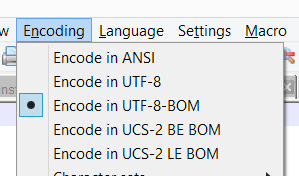
When applying the function htmlentities on some POST input from a user submitted form you may come across an issue with character encoding where characters such as £ and © are not displaying correctly and are prepended with the  character. This is typically caused by a UTF-8 encoding issue and the solution is quite easy. Simply pass in the character set to the htmlentities like this.

htmlentities($value, ENT_COMPAT | ENT_HTML401, 'UTF-8');

The ‘ENT_COMPAT | ENT_HTML401′ paramater is there simply because it is the default for this function, but the important bit is passing in ‘UTF-8′ in the third parameter.

WordPress 404 error redirect

redirect

By simply adding a file called 404.php into your WordPress theme directly you can quite easily create and customize the page shown when a visitors tries to access something which isn’t there. But what if you wanted to automatically redirect this user to your front page (or some other page on your site) instead of showing them a 404 error page? Well, the solution is quite simple.

header("HTTP/1.1 301 Moved Permanently");
header("Location: ". get_bloginfo('url'));

If you place the above code snippet and nothing else into a file called 404.php within the root of your WordPress theme directory then whenever someone tries to view a page which doesn’t exist they will be automatically and instantly redirected to your sites homepage.

Be careful though, you need to make sure that there are no spaces, empty lines or any other type of output (includng HTML) above those two lines of code. If there are then you’ll most likely get a PHP error complaining that the headers cannot be set as there has already been some output.

Of course you don’t necessarily have to redirect them to your front page. You could change it to redirect all 404 page not found requests to some other page on your site. For example, the following code snippet would redirect the visitor to your “/about/” page.

header("HTTP/1.1 301 Moved Permanently");
header("Location: ". get_bloginfo('url') . "/about/");

It’s as simple as that. You’ve now redirected all 404 page not found requests to some other page on your site. Simple!

PHP Tutorial

Language Detection and Internationalization

Language Detection and Internationalization

Language Detection and Internationalization

php

In this article, we’ll show you how to use language files and deliver your site in alternate languages.

In your application, any text that you want to deliver in multiple languages needs to be wrapped with a gettext marker. In PHP, it’s a special function that uses the underscore character as its name.

<?php
// Correct internationalization method.
echo _("This text will be automatically replaced.");

// Correct internationalization with variables.
$text = _("text");
echo _(sprintf("This %s will be automatically replaced.", $text));

// Not gonna work the way you think.
echo _("This $text will be automatically replaced.");

Don’t worry – even if nothing else is setup, string wrapped in the gettext function will still show up in their original format.

Next, you’ll need a bit of extra software – POEdit. This is a cross-platform program that lets you create and manage gettext catalogs, which are the things you’ll need to store your translated text.

When you run POEdit and create a new catalog (I recommend creating a Languages/ folder inside your application for them), you can select the language this catalog will be used for (each catalog is for a single file) and the location of your PHP files. POEdit will automatically parse your application looking for the gettext functions and show you a window listing every string in the original language (within your PHP files) and a blank text area where you can add the translated version of that string. Fancy, eh? Once you save your catalog, POEdit will automatically created a compiled version in the same folder, ending with an .mo extension.

Note: Your compiled message catalog must be in a folder named like follows (assuming a root of Languages/): Languages/it_IT.UTF8/LC_MESSAGES/myapp.mo, where myapp is the name of the text domain being used

Now that you have a catalog compiled and in your Languages/ folder, you need to tell your app to use it – if it’s needed.

<?php
// Use Italian/Italy.
$locale = "it_IT";

// Create an environment variable for the new locale.
// This will only live as long as the request.
putenv("LC_ALL=" . $locale);

// Sets the PHP locale to the first match given. The empty string will use the system default if nothing else is matched.
setlocale(LC_ALL, "$locale.utf8", $locale, "");

// Create a new text domain and point it to our language folder.
bindtextdomain("myapp", "./Languages");

// Set the codepage to use for text.
bind_textdomain_codeset("myapp", "UTF-8");

// Select the new text domain for looking up text.
textdomain("myapp");

// In this example, the catalog must be located at:
// Languages/it_IT.UTF8/LC_MESSAGES/myapp.mo

Finally, how do you tell what the user wants the language to be? Your best bet is to use the browser’s ACCEPT_LANGUAGE header. In PHP 5.3 and newer, there is a built-in function to handle this. If you are using an older version, you’ll need some extra code to figure it out.

<?php
/**
* Returns the best-choice locale string for the current request.
*
* @return string Browser's preferred language if available, or "en_US" if not.
*/
function getLanguage() {
// Set a default return value in case nothing else is found.
$return = "en_US";
// In PHP 5.3 and newer, we can use this function
if (function_exists("locale_accept_from_http")) {
$return = Locale::acceptFromHttp($_SERVER["HTTP_ACCEPT_LANGUAGE"]);
}
// In PHP 5.2 and older, we need to do this the hard way.
else {
$langs = explode(",", $_SERVER["HTTP_ACCEPT_LANGUAGE"]);
$lang = array();
foreach ($langs as $val) {
$matches = array();
if (FALSE !== preg_match("/(.*);q=([0-1]{0,1}\.\d{0,4})/i", $val, $matches)) {
$lang[$matches[1]] = (float)$matches[2];
}
else {
$lang[$val] = 1.0;
}
}
$qval = 0.0;
$pref = NULL;
foreach ($lang as $key => $value) {
if ($value > $qval) {
$qval = (float)$value;
$pref = $key;
}
}
if (TRUE === isset($pref)) {
$pref = explode("-", $pref);
if (FALSE === is_array($pref)) {
$pref = explode("_", $pref);
}
if (TRUE === is_array($pref)) {
if (TRUE === isset($pref[0])) {
$pref[0] = mb_strtolower($pref[0]);
}
if (TRUE === isset($pref[1])) {
$pref[1] = mb_strtoupper($pref[1]);
}
$return = implode("_", $pref);
}
}
}
return $return;
}

So to sum up, create folders for your languages, use POEdit to create and manage catalogs for each language used by your app, always check for the language to use during a request (although if you allow users to set their language preference, that should take precedence over the browser header), and wrap any text you want to be delivered in multiple languages with the _() function.

Have fun and good luck!

PHP Tutorial

PHP Read and Write to File Tutorial

Reading and writing on files

Many times the there is the needing to save the data.
There are two ways to do it:
– Saving the data in a file (.txt, .dat, ecc…)
– Saving the data in a database (Access, Mysql, ecc…)
Now we analyze the first case, saving the data in a file.
It is more convenient to save data in a text file when you have to save a little quantity of data, on the contrary when you have to save, and therefore interact with a great quantity of data it is better to use a database. In this article we want to see how to read and write in a file named “pippo.txt”.

Writing on files


Before writing on a file we must open it, therefore we use the following expression:
$write_file=fopen("pippo.txt","w");
$write_file is called pointer and it is used to open the file by the istruction fopen that has, as first argument, the name of the file and, as second argument, the modality to open it.
“w” means that we want to open the file pippo.txt to write on it.
Other modalities to open a file are the following:
“r” -> opens the file in reading modality
“r+” -> opens the file in reading+writing modality
“w” -> opens the file in writing modality
“w+” -> opens the file in reading+writing modality
“a” -> opens the file in writing modality and insert the pointer at the end of file (“w” at the start)
“a+” -> opens the file in reading+writing modality
Now we want to write in the file the string “Hello!!!”, therefore we use the following code:
$string="Hello!!!";
fwrite($write_file,$string);
fclose($write_file);

The istruction fwrite writes the string $string in the file pippo.txt. fwrite has, as first argument, the pointer that we used to open the file and, as second argument, the string that we want to write on the file. fclose needs to close the interaction with the file.

Reading on files


Now we want to read the string that we have written in the file.
To do it, before all, we must open the file in reading modality, therefore we write the following line of code:
$read_file=fopen("pippo.txt","r");
$read_file is a pointer that use the fopen instruction to open the file pippo.txt in reading modality this time.
To read the content of file we must write the following code:
$dim_file=filesize("pippo.txt");
$content=fread($read_file,$dim_file);
fclose($read_file);

To read the complete content of the file we must know his dimension, therefore we use the instruction filesize that calculates the dimension (in bytes) of the file that has in his argument. The instruction fread open the file to read his content. fread has, as first argument, the pointer to open the file in reading modality and, as second argument, the portion of file that we want to read, in this case all the file. Then fread stores the content of file in the variable $content.
Even in this case fclose closes the interaction with the file.
If we want to print on screen the content of the file pippo.txt, we need to write easily:
echo $content;
On the screen it will be displayed the string Hello!!!

Complete code

The complete code to read and write on a file, as seen in this article, is the following, remembering to you that the symbols // are used to introduce a comment in php:
// String to write on file
$string="Hello!!!";
// Writing on file
$write_file=fopen("pippo.txt","w");
fwrite($write_file,$string);
fclose($write_file);
// Reading on file
$raed_file=fopen("pippo.txt","r");
$dim_file=filesize("pippo.txt");
$content=fread($read_file,$dim_file);
fclose($read_file);
// Printing on screen the content of file
echo $contenuto;